Browser Keyboard Shortcuts — Make Your Internet Browsing Super Fast (Complete English Guide)
Today, internet browsing has become a part of our daily routine — whether it’s office work, online classes, shopping, research, entertainment, or social media.
But here’s the truth:
If you rely only on your mouse, your speed becomes almost half.
Smart users, professionals, programmers, digital marketers, bloggers — all of them use keyboard shortcuts because they help you work 2–3 times faster.
In this complete guide, we will learn:
- Browser keyboard shortcuts
- Shortcuts for tabs, search, navigation & privacy
- Time-saving pro tips
- Shortcuts for both Windows & Mac
- Real-life usage examples
And the best part?
Keyboard shortcuts are super easy to learn — just a little practice!
Table of Contents (SEO Optimized)
(Helps Google + Users)
- Why Browser Keyboard Shortcuts Matter
- Tab Control Shortcuts
- Search & Address Bar Shortcuts
- Page Navigation Shortcuts
- Refresh & Reload Shortcuts
- Privacy & Security Shortcuts
- Zoom & Readability Shortcuts
- Page Handling & Scrolling
- Bookmarks & Downloads Shortcuts
- Real-Life Usage Examples
- Common Shortcuts for Mac Users
- Beginner Tips for Learning Shortcuts
- Most Useful Browser Shortcuts — Quick Table
- Hidden Productivity Browser Shortcuts
- Smart Google Search Tips
- Privacy & Safety Tips
- Common Beginner Mistakes
- Advanced Browser Productivity Tips
- Tips for Students, Bloggers & Office Users
- FAQ — Browser Keyboard Shortcuts
- Final Golden Tips
Part 1: Why Should You Learn Browser Keyboard Shortcuts?
Let’s first understand why shortcuts are so important:
1. They Save a Lot of Time
One click vs one key press…
Faster work = Higher productivity
2. You Become Less Dependent on the Mouse
Especially useful when working on laptops or during travel.
3. Multitasking Becomes Effortless
You can switch between tabs and windows instantly.
4. You Develop Professional Browsing Habits
Helpful in every field:
- IT
- Digital Marketing
- Blogging
- Office Work
- Freelancing
- Research & Studies
Part 2: Tab Control Shortcuts — Your Browsing Speed Booster
Open a New Tab
Windows: Ctrl + T
Mac: Command (⌘) + T
Use this when you want to:
- Search something new
- Open a website without closing the current one
Reopen the Last Closed Tab
Windows: Ctrl + Shift + T
Mac: Command (⌘) + Shift + T
Accidentally closed an important tab?
Use this shortcut — and it comes back instantly!
Switch Between Tabs
Windows:
Next tab → Ctrl + Tab
Previous tab → Ctrl + Shift + Tab
Mac:
Next tab → Control + Tab
Or jump directly to a specific tab:
Ctrl + 1 → 8 = Go to tab number 1–8
Close the Current Tab
Windows: Ctrl + W
Mac: Command (⌘) + W
No need to drag the mouse to the close button.
Part 3: Search & Address Bar Shortcuts — Lightning-Fast Surfing
Go to the Address Bar Instantly
Windows: Ctrl + L
Mac: Command (⌘) + L
Just type → Press Enter → Done.
Instant Search
Simply type in the address bar — your browser automatically searches on Google.
Part 4: Page Navigation Shortcuts — Forward Easily
Go Back
Alt + Left Arrow
Go Forward
Alt + Right Arrow
Works in almost all browsers: Chrome, Edge, Firefox, Brave.
Part 5: Refresh, Reload & Hard Reload
Normal Refresh
Windows: F5 or Ctrl + R
Mac: Command (⌘) + R
Hard Refresh (Bypass Cache)
Windows: Ctrl + Shift + R
Mac: Command (⌘) + Shift + R
Very useful for:
- Developers
- Bloggers
- Designers
- Website updates
Because it loads the fresh version of the page.
Part 6: Privacy & Security Shortcuts
Clear Browsing History
Windows: Ctrl + Shift + Delete
Mac: Command (⌘) + Shift + Delete
You can clear:
- Cache
- Cookies
- Browsing history
Open Incognito / Private Mode
Windows: Ctrl + Shift + N
Mac: Command (⌘) + Shift + N
Use it when:
- Logging into someone else’s account
- Doing private browsing
- You don’t want your history saved
Part 7: Zoom & Readability Shortcuts
Zoom In → Ctrl + +
Zoom Out → Ctrl + –
Reset Zoom → Ctrl + 0
Perfect for users who find small text difficult to read.
Part 8: Page Handling & Scrolling Shortcuts
Go to Top of Page → Home / Fn + Left Arrow
Go to Bottom → End / Fn + Right Arrow
Scroll:
Spacebar → Scroll down
Shift + Spacebar → Scroll up
Part 9: Download, Bookmark & Tools Shortcuts
Open Download Manager → Ctrl + J
Add Bookmark → Ctrl + D
Open Bookmark Manager → Ctrl + Shift + O
Part 10: Real-Life Usage Examples
Example 1 — Blogging / Writing
- Research faster
- Manage multiple tabs
- Open sources quickly
Example 2 — Students
- Quickly search notes
- Keep study tabs organized
- Research faster
Example 3 — Office / Work from Home
- Check emails faster
- Switch dashboards instantly
- Browse reports smoothly
Part 11: Common Rules for Mac Users
Just remember:
Ctrl (Windows) = Command ⌘ (Mac)
Most shortcuts remain the same.
Part 12: Best Tips for Beginners
- Practice 5–6 shortcuts daily
- Slowly reduce mouse usage
- Learn to manage tabs efficiently
- Build shortcut habits
Within a few days —
you’ll browse like a pro!
Part 13: Most Useful Browser Shortcuts — Quick Table
| Task | Windows Shortcut | Mac Shortcut |
| Open New Tab | Ctrl + T | ⌘ + T |
| Reopen Closed Tab | Ctrl + Shift + T | ⌘ + Shift + T |
| Close Tab | Ctrl + W | ⌘ + W |
| Next Tab | Ctrl + Tab | Control + Tab |
| Previous Tab | Ctrl + Shift + Tab | Control + Shift + Tab |
| Go to Last Tab | Ctrl + 9 | ⌘ + 9 |
| Select Address Bar | Ctrl + L | ⌘ + L |
| Refresh Page | F5 / Ctrl + R | ⌘ + R |
| Hard Refresh | Ctrl + Shift + R | ⌘ + Shift + R |
| Open History | Ctrl + H | ⌘ + Y |
| Open Downloads | Ctrl + J | ⌘ + Option + L |
| Zoom In/Out | Ctrl + + / – | ⌘ + + / – |
| Reset Zoom | Ctrl + 0 | ⌘ + 0 |
| Private Window | Ctrl + Shift + N | ⌘ + Shift + N |
| Add Bookmark | Ctrl + D | ⌘ + D |
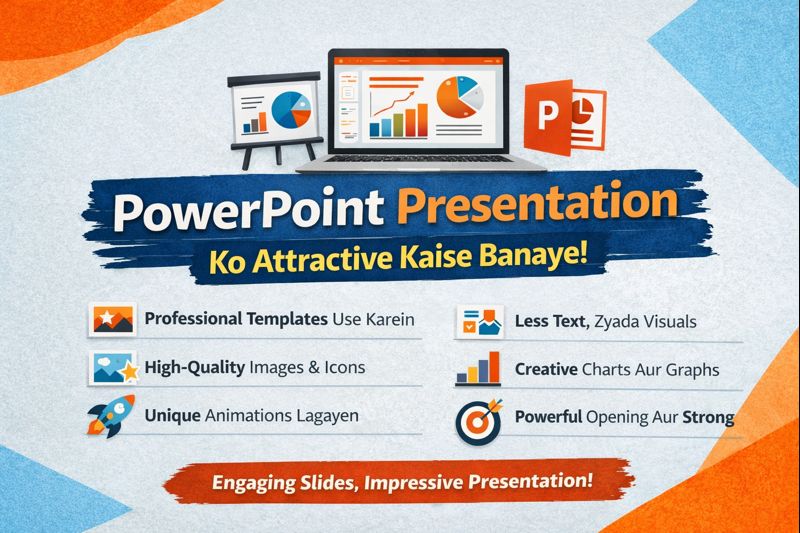
PowerPoint Presentation Ko Attractive Kaise Banaye – Complete Guide in English
When someone hears the word “presentation”, the first image that comes to mind is usually a boring slideshow full of long paragraphs and tiny text. But a well-designed PowerPoint can do the opposite – it can grab attention, explain your ideas clearly, and leave a strong impression on your audience.
If you want to know how to make your PowerPoint presentation look attractive, this guide will walk you through every important step – from colours and fonts to images, animations, and storytelling.
1. Start With the Purpose, Not the Slides
Before you open PowerPoint, ask yourself:
- Why am I creating this presentation?
(To sell, to teach, to update, to motivate?) - Who will see it?
(Students, managers, clients, general audience?) - What should they remember at the end?
Write your main message in one line, for example:
Every slide you create should support this main goal.
Attractive design without clear purpose always feels empty.
2. Use a Clean and Consistent Slide Layout
Messy slides instantly make a presentation look unprofessional.
To make your deck visually appealing:
- Choose one slide layout style and stick with it.
- Keep margins (space around content) similar on all slides.
- Use alignment (left, centre, right) thoughtfully – don’t mix everything randomly.
- Avoid overcrowded slides; one key idea per slide is a good rule.
You can:
- Use a title + content layout for most slides.
- Use title + two-column layout when you want to compare things.
- Use blank + big image + short text for powerful visual slides.
Consistency makes your presentation look modern and professionally designed.
3. Choose the Right Color Palette
Colour can make your presentation either eye-catching or painful to look at.
How to choose attractive colours:
- Limit yourself to 2–3 main colours
- One primary colour (for headings, main elements)
- One secondary colour (for highlights, buttons, shapes)
- One neutral colour (white, grey, black for background or text)
- Keep enough contrast
- Light text on a very light background is hard to read.
- Dark text on a dark background is also a problem.
- Example: White or light grey text on a dark blue background looks clean.
- Avoid loud colour combinations
Neon green on red, or yellow on white, might look flashy but will tire the eyes quickly.
If you are unsure, a simple, elegant combination is:
- Dark blue / dark grey + white + one accent colour like orange or teal.
4. Use Fonts That Look Professional and Easy to Read
Fonts contribute a lot to the attractiveness of your presentation.
Basic font rules:
- Use maximum 2 fonts in your entire deck
One for headings (e.g., a bold, slightly bigger font)
One for body text (simple, clean)
- Avoid overly decorative fonts. They might look stylish for posters, but not for slides.
Good choices include:
- Calibri
- Arial
- Segoe UI
- Roboto
- Open Sans
Font sizes that work well:
- Title: 32–44 pt
- Section headings: 28–32 pt
- Body text: 18–24 pt
If someone sitting at the back of a room can’t read your slide, it’s not attractive—it’s frustrating.
5. Turn Long Paragraphs into Short Bullet Points
Nothing kills a presentation faster than huge blocks of text.
Instead of writing like a document:
Our company was founded in 2010 and since then we have been growing steadily in different markets…
Turn it into shorter, digestible lines:
- Founded in 2010
- Active in X countries
- Serving Y+ customers
- Focus on quality, innovation, support
Tips for better bullet points:
- Use 3–5 bullet points per slide (not 12–15).
- Each bullet should be one short sentence or phrase.
- Highlight important words using bold.
Your spoken words + short bullet points = perfect combo.
6. Use High-Quality Images and Icons
Attractive presentations rely heavily on visuals.
Images:
- Choose high-resolution pictures – blurry images look unprofessional.
- Use images that support the content, not just fill space.
Talking about teamwork? Use a relevant photo of people collaborating.
Talking about growth? Use a graph-style visual or arrow.
Icons:
Icons are great for representing ideas like:
- Features
- Steps in a process
- Advantages / Disadvantages
- Categories
For example, instead of writing:
- Fast
- Secure
- Easy to use
You can use small icons next to each word – a speedometer, a lock, a tick mark.
This makes your slides more visual, cleaner, and easier to scan.
7. Use Shapes and Visual Hierarchy
PowerPoint offers shapes (rectangles, circles, arrows, etc.). When used well, they can make your slides more structured and attractive.
- Use rectangles or rounded boxes to group related content.
- Use arrows to show flow or direction.
- Use different sizes to create visual hierarchy:
Big = important
Medium = supporting
Small = detail
For example, you can show a 3-step process:
- Step one (big box)
- Step two (big box)
- Step three (big box)
All aligned and equally sized – it looks clean and professional.
8. Be Careful with Animations and Transitions
Many beginners make the mistake of overusing animations like flying text, spinning images, or random flashy effects. This makes the slideshow look childish instead of professional.
Good practices:
- Use simple transitions between slides (e.g., Fade).
- Use minimal animations for content (e.g., Appear, Fade-in).
- Avoid using many different styles in one presentation.
Animations should:
- Help guide the viewer’s attention.
- Reveal information step-by-step.
- Never distract from what you are saying.
9. Use Storytelling Instead of Just Information
Attractive presentations are not only about design; they’re also about how your content flows.
Think of your presentation as a story:
- Beginning – Introduce the topic and why it matters.
- Middle – Explain key points, problems, solutions, or data.
- End – Summarize, give a clear conclusion or call-to-action.
Examples:
- For a sales pitch: Start with the customer’s problem → show the impact → introduce your solution → highlight benefits → end with a clear next step.
- For a student project: Start with the background → explain research or method → show findings → end with what you learned or recommend.
A clear story structure keeps people interested from start to finish.
10. Use Data Visuals Instead of Raw Numbers
If your presentation includes numbers, comparisons, or statistics, don’t just type them in bullet points.
Instead, use:
- Bar charts to compare quantities
- Pie charts to show percentages
- Line charts to show trends over time
Keep your charts:
- Simple
- Clean
- With readable labels
Avoid 3D effects and too many colours – they can make charts confusing.
11. Leave Enough White Space (Empty Space)
White space doesn’t mean wasted space—it means breathing room.
Crowded slides feel heavy and tiring. Slides with proper spacing look modern and premium.
Tips:
- Don’t fill every corner with text or images.
- Keep some areas intentionally empty so the important elements stand out.
- Use spacing between lines, sections, and blocks.
Think of your slide like a clean poster, not like a full-page newspaper.
12. Design a Strong Opening and Closing Slide
The first and last slides are the most important in terms of impact.
Opening slide:
- Topic title
- Your name / organization
- A simple visual or background
- Possibly a tagline or short line about what the presentation covers
Closing slide:
- Short summary or main conclusion
- “Thank you” or “Any questions?”
- Your contact details (if needed)
- A clean, strong visual or background
A powerful start and a neat ending make the whole presentation feel memorable.
13. Check Consistency Before You Present
Before you call your presentation “final”, review it like a designer:
- Are fonts consistent on all slides?
- Are colours matching your chosen palette?
- Do all titles look similar in size and alignment?
- Are images aligned neatly?
- Any spelling or grammar errors?
You can also zoom out in Slide Sorter view and see all slides together – this helps you visually check consistency and flow.
14. Practice With the Slideshow View
Attractive design matters, but how you present it matters even more.
Open your slide show and:
- Click through the slides as if you’re presenting to real people.
- Check if any slide feels too crowded or slow.
- Notice if any animation feels unnecessary or too flashy.
- Practice what you’ll say with each slide.
Your confidence + good design = truly attractive presentation.
15. Quick Checklist – Attractive PowerPoint Presentation
You can use this checklist before finalizing:
- One clear main message or goal
- Consistent layout and alignment
- 2–3 colour palette, no harsh combinations
- Professional fonts, easy to read
- No long paragraphs, only short bullet points
- High-quality images and meaningful icons
- Simple animations and transitions
- Logical flow and storytelling structure
- Clean charts for data, not raw numbers
- Proper margin and white space
- Strong opening and closing slides
- Proofread for errors
- Tested once in Slide Show mode
If most of these are ticked, your presentation will already look much better than the average slideshow.
16. Use Slide Masters to Maintain a Clean & Professional Design
Most people design every slide separately — and that’s why their presentation looks inconsistent. PowerPoint has a powerful feature called Slide Master that helps you define:
✔ Font style
✔ Font size
✔ Color scheme
✔ Background
✔ Title design
✔ Footer and page number placement
And once you set it, all slides automatically follow the same format.
Why Slide Master Makes Your Presentation Attractive
- It keeps everything uniform
- Saves a lot of time
- Gives a professional polish
- Reduces formatting mistakes
Simple Way to Use It
- Go to View → Slide Master
- Edit the master layout once
- Apply it to all slides
Now your full presentation will look like it was made by a professional designer.
17. Use Visual Flow — Guide the Audience’s Eyes
Attractive presentations are not random. They guide the viewer’s attention in the correct order.
You can control this through:
✔ Headings
✔ Image placement
✔ Line spacing
✔ Arrows or shapes
✔ Logical content order
For example:
- Big title at the top
- Supporting image or graphic
- Short bullet points
This creates a natural flow, making your presentation easy to understand.
18. Use Contrast to Highlight Key Points
Contrast simply means difference between elements — like dark vs light, bold vs normal, big vs small.
Examples of contrast in slides
- Dark heading + light body text
- Bold keywords inside normal text
- Large numbers when showing statistics
- Light background with dark shapes
Contrast helps your viewers instantly see what is important.
No contrast = everything looks the same = nothing stands out.
19. Avoid Common Mistakes That Ruin Presentation Design
Many presentations do not look attractive not because of lack of features — but because of common mistakes.
Here are the biggest ones 👇
Too Much Text on a Single Slide
People start reading instead of listening — attention drops instantly.
Random Colors & Fonts
Makes the presentation feel childish or noisy.
Clipart & Low-Quality Images
They make your work look outdated.
Animation Overload
Flying, spinning, zooming, bouncing… all in one slide?
Your audience will remember the animation — not your message.
Inconsistent Alignment
Unaligned elements look messy and distracting.
✔ The rule is simple:
Clean → Simple → Focused → Organized = Attractive
20. Add Meaningful Quotes, Callouts & Highlights
Sometimes a strong line or quote can make your slide memorable.
Examples:
“Design is thinking made visual.”
“People don’t remember slides. They remember how you made them feel.”
Or highlight important words using:
✔ Bold
✔ Color
✔ Shapes
✔ Callout boxes
This increases the visual impact of your presentation.
21. Use Professional Templates — But Customize Them
PowerPoint already includes built-in templates, and there are many modern templates available online.
But here’s the key:
Don’t use templates as they are. Customize them.
Change:
✔ Fonts
✔ Colors
✔ Icons
✔ Layout spacing
This way your presentation looks unique — not like something copied from the internet.
22. Add Subtle Backgrounds — But Keep Text Readable
A background should support the content — not compete with it.
Good background choices include:
✔ Light gradients
✔ Soft textures
✔ Simple abstract shapes
✔ Soft image overlays
Avoid:
- Busy photos behind text
- Neon color backgrounds
- Patterns that make text hard to read
If using an image background, reduce transparency so text remains clear.
23. Make Numbers Look Beautiful — Not Boring
When you show numbers or statistics:
Don’t do this:
“Revenue increased from 2M to 3.5M in 2 years.”
Do this instead:
Revenue Growth (2 Years)
✔ 2.0 Million → 3.5 Million
✔ +75% Growth
✔ 12% Monthly Average Rise
Use:
✔ Icons
✔ Bold highlights
✔ Charts
✔ Color coding
Numbers should tell a story — not just sit on a slide.
24. Keep Your Slides Audience-Centric
Always ask:
“If I were sitting in the audience, would this slide interest me?”
Your slides should:
✔ Be easy to read
✔ Visually appealing
✔ Support your speech
✔ Not compete with your voice
Never read slides word-for-word.
Slides are visual support, not your script.
25. Build Powerful Section Break Slides
When you switch topics, use section divider slides like:
- “Market Overview”
- “Our Solution”
- “Key Results”
- “Future Plans”
This gives your presentation structure — and structure = attractiveness + clarity.
26. Use Speaker Notes Instead of Filling Slides
If you need details to remember while presenting, use speaker notes — not the main slides.
This keeps the audience view clean while you still have helpful references.
27. Test Your Presentation on Different Screens
Sometimes a design looks perfect on your laptop…
…but too dark, too small, or too bright on a projector.
So always test:
✔ On a projector
✔ On a larger display
✔ With room lights ON
This ensures your presentation remains attractive in real conditions.
28. Use Emotion — Not Just Information
Attractive presentations connect emotionally.
You can do this by:
✔ Using real-world examples
✔ Sharing experiences
✔ Using relatable visuals
✔ Asking questions
People remember feelings more than facts.
29. End With Impact — Not Just “Thank You”
Instead of a plain ending slide, use:
- A strong summary
- Key takeaway
- Call-to-action
- Inspiring closing line
For example:
“Design your slides the way you wish others would present to you.”
This leaves a lasting impression.
30. Bonus Tips to Make Your PowerPoint Even More Attractive
✔ Use icons instead of long labels
✔ Use grids for alignment
✔ Avoid stretched images
✔ Use brand colours where possible
✔ Keep slide titles short
✔ Maintain equal padding/margins
✔ Use shadows very lightly
✔ Prefer vector graphics over bitmaps
Small details → BIG design improvement